Management, Supervision & Leadership
Sep 30, 2026
How to Use the Excel Fill Handle to Auto-Fill Data
Key Takeaways
The fill handle is the small square at the bottom-right corner of a selected cell that lets you auto-fill data, patterns and formulas by dragging.
The fill handle works with numbers, dates, text patterns and formulas, automatically detecting and extending the series you start.
Understanding relative and absolute cell references controls whether formulas adjust or stay fixed when you fill them across cells.
If the fill handle is missing or not working as expected, a few quick settings adjustments can restore it.
The Excel fill handle is one of the fastest ways to eliminate repetitive data entry in your spreadsheets. Located at the bottom-right corner of any selected cell, this small square lets you drag to auto-fill numbers, dates, text patterns and formulas into adjacent cells in seconds. This guide covers how to use the fill handle for data series and formulas, along with tips for troubleshooting common issues.
What Is the Fill Handle in Excel?
The fill handle in Excel is the small dark square that appears at the lower-right corner of a selected cell or range. When you hover your cursor over it, the pointer changes from a white cross to a thin black crosshair (+). Clicking and dragging that crosshair extends the cell's content into adjacent cells, either vertically (up or down) or horizontally (left or right).
The fill handle can auto-fill several types of data:
Numbers (sequential or patterned increments)
Dates (days, weeks, months or years)
Days of the week and month names (abbreviated or full)
Text-number patterns such as "Q1, Q2" or "Item 1, Item 2"
Formulas (with automatic reference adjustment)
Custom lists you define in Excel's settings
How the Fill Handle Detects Patterns
Excel analyzes the cells you select before filling to determine the pattern it should continue. If you select a single value, the fill handle simply copies that value. If you select two or more values, Excel calculates the increment between them and extends it.
What You Enter | What the Fill Handle Produces | Why |
|---|---|---|
1 | 1, 1, 1... | One value gives Excel no pattern, so it copies |
1, 2 | 3, 4, 5... | Excel detects a +1 increment |
5, 10 | 15, 20, 25... | Excel detects a +5 increment |
Mon | Tue, Wed, Thu... | Excel recognizes day abbreviations |
Jan | Feb, Mar, Apr... | Excel recognizes month names |
Q1 | Q2, Q3, Q4... | Excel increments the numeric portion of a text-number pattern |
1/1/2025, 2/1/2025 | 3/1/2025, 4/1/2025... | Excel detects a one-month date interval |
How to Use the Fill Handle Step by Step
Filling a Data Series (Numbers, Dates and Patterns)
Use the fill handle to quickly extend a series of numbers, dates or text patterns across a row or column.
Enter the starting values that establish your pattern. For a simple number series, type the first two values (for example, type 1 in cell A1 and 2 in cell A2).
Select both cells so Excel can detect the increment.
Hover your cursor over the small square at the lower-right corner of the selection until the cursor turns into a thin black crosshair (+).
Click and hold the left mouse button, then drag the fill handle in the direction you want the series to extend.
Release the mouse button. Excel fills the cells with the continued pattern.
After you release the mouse button, a small Auto Fill Options button appears near the last filled cell. Click it to choose from these options:
Copy Cells: Duplicates the exact same value(s) instead of continuing a series
Fill Series: Continues the detected pattern or increment (the default for number patterns)
Fill Formatting Only: Applies the source cell's formatting — including conditional formatting rules — without copying any values
Fill Without Formatting: Copies or extends values but ignores the source cell's formatting
Flash Fill: Detects a more complex pattern across your data and fills accordingly
You can also double-click the fill handle instead of dragging it. When adjacent columns contain data, double-clicking automatically fills down to the last row of that neighboring data.
Filling Formulas with the Fill Handle
The fill handle copies formulas to multiple cells so you do not have to retype them. As long as you are using relative references (coordinates without "$" markers in them), Excel adjusts the formula each time it copies to apply to the associated data. For example, copying a formula that multiplies cell A1 by B1 to produce a value in C1 can be copied to C2 through C15, and Excel replaces A1 and B1 with A2 and B2 for row two, A3 and B3 for row three, etc.
Follow these steps to copy a formula using the fill handle:
Select the cell that contains the formula you want to copy.
Hover your cursor around the black square in the lower right corner of the cell until your cursor turns into a plus sign.
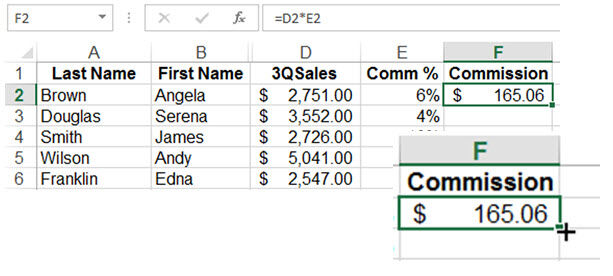
Click and hold the left mouse button while dragging the handle to include all cells where you would like the formula copied.
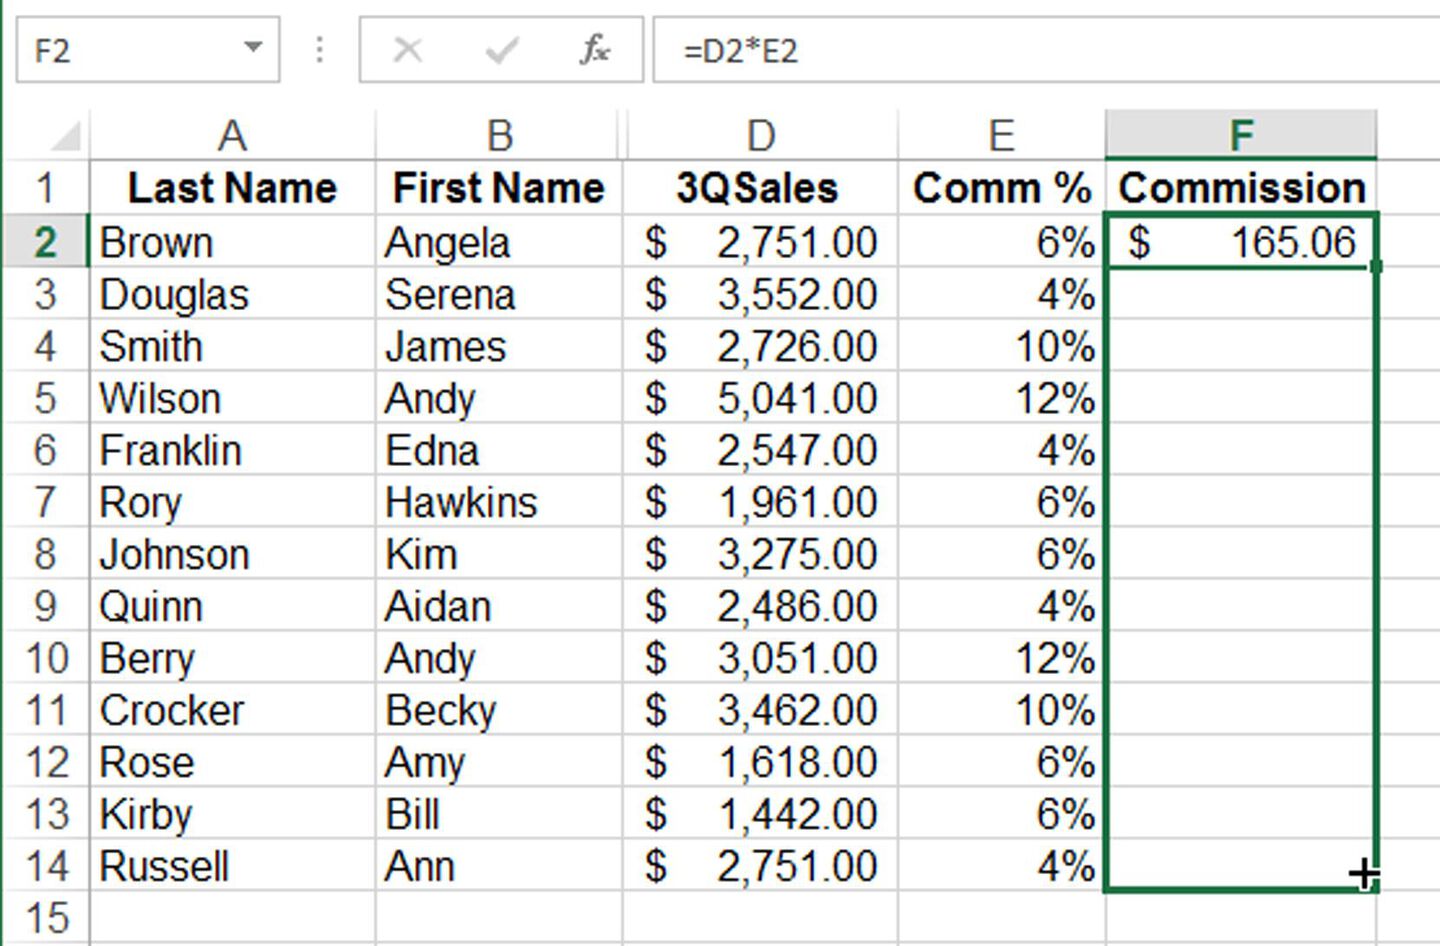
Release the mouse button to populate the cells with the formula.
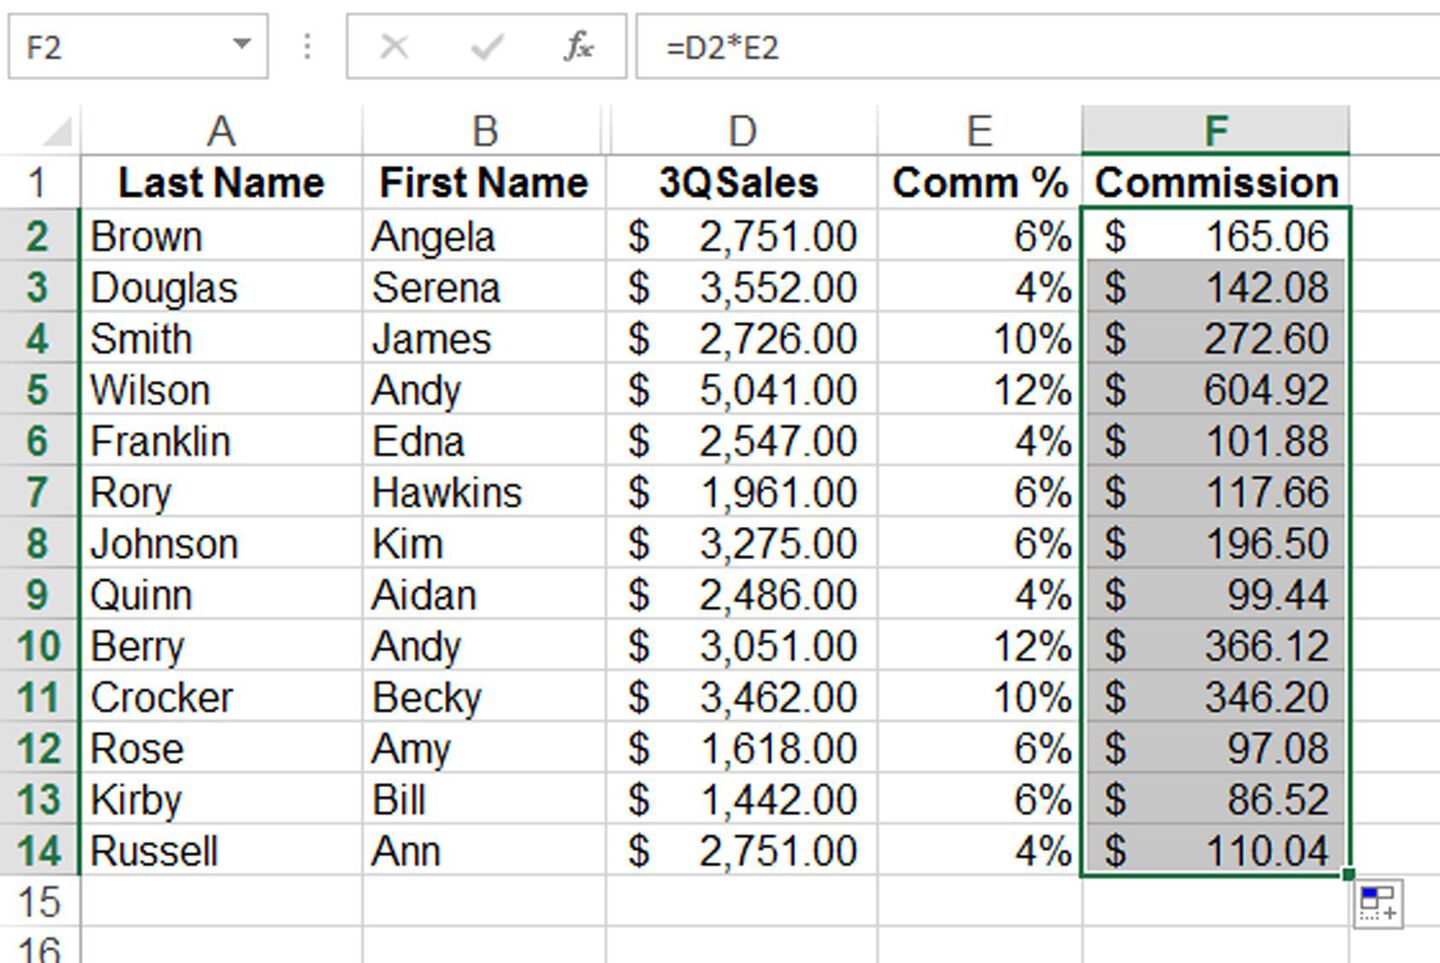
You can also double-click the fill handle instead of dragging. When the column next to your formula contains data, double-clicking fills the formula down to the last row of that neighboring data automatically.
There may be times when you do not want Excel to adjust all or part of the formula for you. For example, if you have a table of standard multipliers, you might want the same cell to always be used to multiply. You can create an absolute reference by inserting a "$" sign to the left of the part of the cell coordinate that you want to stay the same. If you always want to use cell C2, you would write it as "$C$2". You can also create a mixed reference by locking only the column or only the row. For example, $A1 keeps the column fixed on A but lets the row number change, while A$1 keeps the row fixed on 1 but lets the column letter change. Mixed references are useful when you need a formula to adjust in one direction but stay anchored in the other.
Fill Handle Tips, Tricks and Troubleshooting
Once you are comfortable with the basics, these tips will help you handle common fill handle scenarios and fix issues when they arise.
Filling non-adjacent cells: Select the cell that contains the formula you want to copy, then right-click to select Copy (or Ctrl+C). Next, select the destination cells (hold Ctrl to click multiple non-adjacent cells), then right-click to choose Paste (or Ctrl+V).
Fill handle missing: If you do not see the small square at the corner of your selected cell, the feature may be turned off. Go to File > Options > Advanced and make sure "Enable fill handle and cell drag-and-drop" is checked. Click OK and the fill handle will reappear.
Copying instead of incrementing: If the fill handle copies the same value instead of continuing a series, select two cells that establish the pattern before dragging. You can also click the Auto Fill Options button after filling and switch from Copy Cells to Fill Series.
Creating a custom list: Go to File > Options > Advanced, scroll down and click Edit Custom Lists. Enter your custom sequence (for example, department names or regional codes) and click Add. The fill handle will then recognize and extend that list whenever you type the first entry and drag.
Right-click drag: Right-click and drag the fill handle instead of left-clicking. When you release, a context menu appears with options including Fill Series, Fill Days, Fill Weekdays, Linear Trend and Growth Trend. This gives you control over exactly how Excel fills the cells before it commits.