Management, Supervision & Leadership
Jul 27, 2026
How to Insert Excel into Word: Four Practical Methods
Key Learnings
- Copy and paste is the fastest way to insert Excel data into Word, with Paste Special options that let you control formatting.
- Linking Excel data to Word creates a dynamic connection that updates your document whenever the source spreadsheet changes.
- Embedding an Excel object places a fully editable mini-spreadsheet inside your Word file, complete with formulas and multiple sheets.
- Mail merge lets you auto-populate Word documents with rows of Excel data to create letters, labels or reports in bulk.
Excel lives up to its name when crunching numbers or organizing data. However, when you want to convey ideas beyond the table or graph, you will almost certainly turn to Word or PowerPoint. Knowing how to insert Excel into Word is one of the most common cross-application tasks in the workplace, and the right approach depends on what you need the data to do once it lands in your document.
In the examples below, we are going to look at four different ways you can get spreadsheet data into your Word documents: copy and paste, linking, embedding and mail merge. Each method serves a different purpose, from a quick static snapshot to a live connection that updates automatically. To follow along using our example, download ExportWorksheetsToWord.xlsx and open a blank Word document.
Four Ways to Insert Excel Data into Word
The right method depends on whether you need a static snapshot, a live connection to your source file or bulk document generation. Use the comparison table below to choose your path, then follow the step-by-step instructions in each section.
| Method | Best For | Data Updates Automatically? | Editable in Word? |
|---|---|---|---|
| Copy and Paste | Quick, one-time data transfer | No | Yes (as Word table) |
| Link Excel Data | Reports that must stay current with source data | Yes | No (opens Excel to edit) |
| Embed Excel Object | Self-contained documents needing spreadsheet functionality | No | Yes (Excel interface within Word) |
| Mail Merge | Bulk documents populated from Excel rows | No (one-time generation) | Yes (after merge completes) |
Copy and Paste Excel Data into Word
Use this method when you need a fast, one-time transfer and do not need the Word document to stay connected to the original spreadsheet. The simplest way to display Excel data in a Word document is to use Copy/Paste.
- Open the destination Word document.
- In the source Excel spreadsheet, select the data you want to copy then hit CTRL-C.
- In the destination Word document, place the cursor where you want the data, then hit CTRL-V.
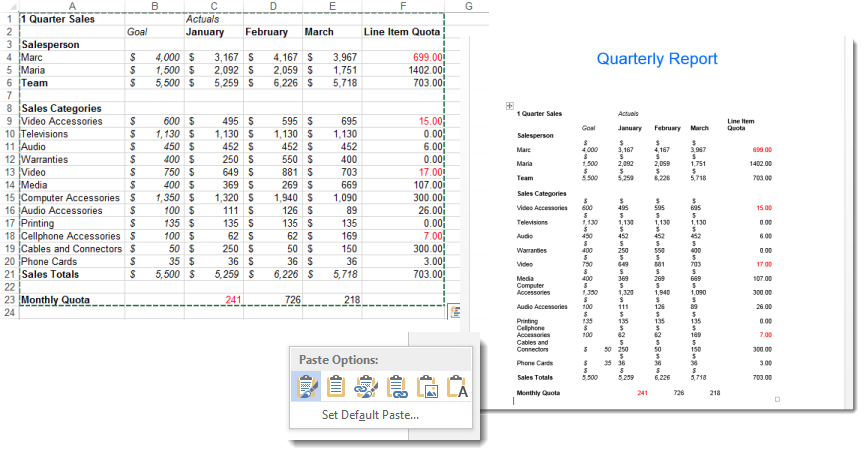
The default paste will use the Keep Source Formatting paste option. This preserves any formatting you have done in Excel and pastes the data into Word as a table using that same formatting. As you can see, you may need to clean up your table after the paste to make it look correct in the new document.
To change the paste option, click the Ctrl dropdown option in the bottom right corner of your new table after pasting and select a new option. You can also use Paste Special (CTRL-ALT-V) to access the full range of options before pasting. Here is what each option does:
- Keep Source Formatting: Pastes the data as a Word table using the same fonts, colors and borders you applied in Excel. Use this when your Excel formatting is already presentation-ready.
- Use Destination Styles: Pastes the data as a Word table but adapts fonts and colors to match your Word document's theme. Use this to keep your document visually consistent without editing in Excel first.
- Link & Keep Source Formatting: Pastes the data as a linked table that retains Excel formatting and updates automatically when the source file changes. Use this for reports that need to stay current.
- Link & Use Destination Styles: Pastes a linked table that adopts Word's formatting and still updates from the source. Use this when you want both a live connection and consistent document styling.
- Picture: Pastes the data range as an image. You can resize it like any other picture, but you cannot edit the data. Use this when you need a clean visual snapshot.
- Keep Text Only: Pastes the cell contents as plain text, with columns separated by tabs and rows as individual paragraphs. Use this when you only need the raw data without any table structure.
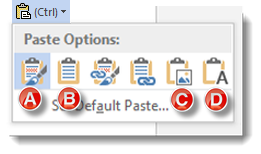
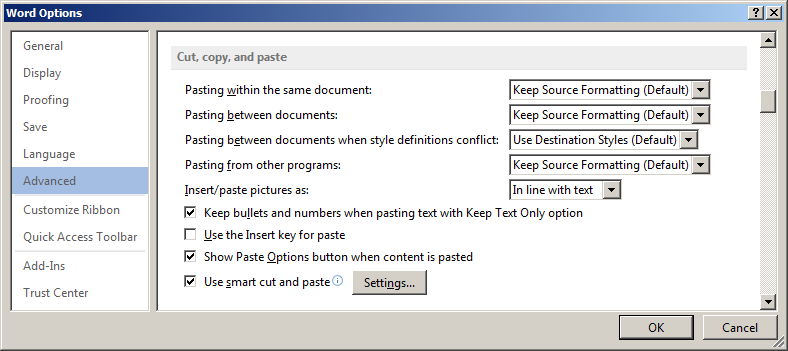
Hint! If you frequently use a paste option that is not Keep Source Formatting, you can click the Set Default Paste link and change the default settings in the Cut, copy and paste section of Word Options.
Link Excel Data to Word
Use this method when you need to link data from Excel to Word so your document always reflects the latest numbers. Linking creates a dynamic connection between the source spreadsheet and the Word document, so any changes you make in Excel appear in Word automatically.
- Open your Excel spreadsheet and select the cells you want to link. Press CTRL-C to copy.
- Switch to your Word document and place the cursor where you want the data to appear.
- Go to the Home tab, click the dropdown arrow beneath Paste and select Paste Special.
- In the Paste Special dialog box, select Paste Link on the left side, then choose Microsoft Excel Worksheet Object from the list. Click OK.
- Save both the Excel file and the Word document.
The linked data will now appear in your Word document. When the source Excel file is updated and saved, Word can pull in those changes automatically. To control this behavior, go to File > Options > Advanced and look for the "Update automatic links at open" checkbox. When this setting is enabled, Word refreshes all linked data each time you open the document.
You can also manage links manually. Right-click the linked object in Word to see options for updating, editing or breaking the link. Keep in mind that both files must remain accessible at their original file paths (same folder, drive or network location) for the link to work. If you move or rename the Excel file, the link will break.
Embed an Excel Object in Word
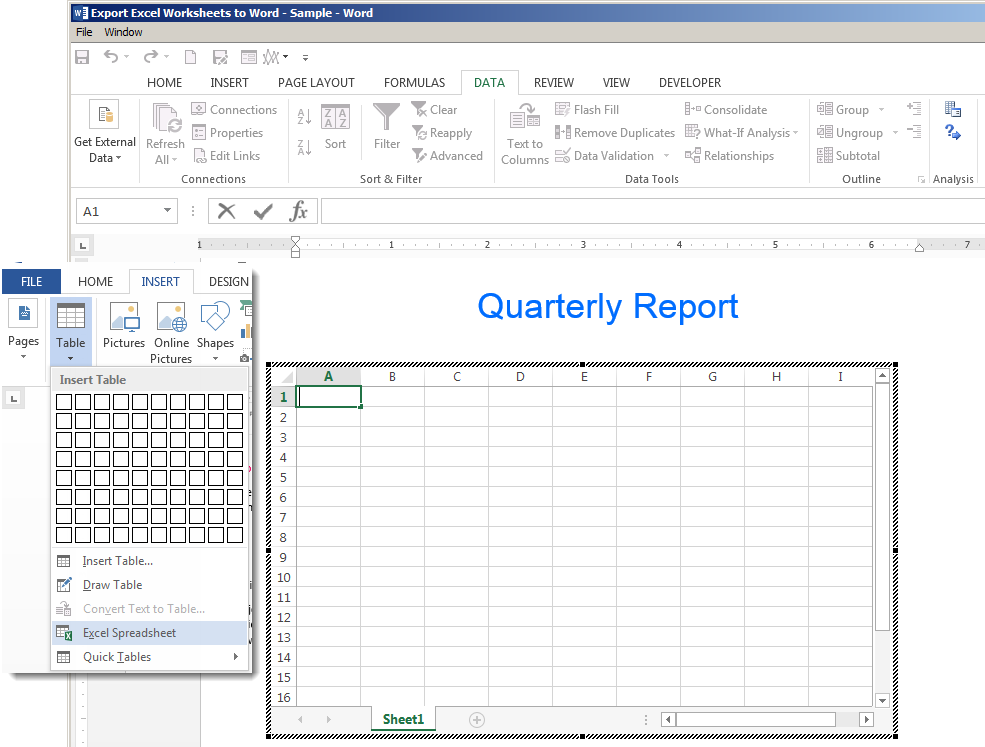
Use this method when you want a self-contained document with full spreadsheet functionality and do not need the data to stay connected to an external file. Inserting your workbook as an Excel object embeds a mini-version of Excel itself into the middle of your Word document. This Excel object can include multiple sheets, filters and many of Excel's features.
1) Place your cursor in the Word document where you want the spreadsheet to appear.
2) Click the Insert tab in the destination Word document, then select Object from the Insert Embedded Object dropdown button.

3) Select the Create from File tab, then browse to the workbook you wish to embed.
4) Make sure the "Link to file" checkbox is unchecked. This ensures the workbook is embedded rather than linked.
5) Click OK to complete the embed.
Double-click the embedded object to open Excel's tools directly within Word. You can edit the data, use formulas and navigate between sheets without leaving your document. Click anywhere outside the object to return to normal Word editing.
Keep in mind that embedding stores the entire workbook inside the Word file, which increases the document's file size. If you only need a portion of your data, consider copying just that range into a new workbook before embedding.
Use Mail Merge to Auto-Populate Word from Excel
Mail merge is ideal when you need to generate multiple personalized documents from a single Word template and an Excel data source. Instead of inserting a table or object, mail merge pulls individual rows of data into designated fields, letting you auto-populate Word documents like form letters, mailing labels, invoices or employee certificates.
- Prepare your Excel spreadsheet so that the first row contains clear column headers (e.g., First Name, Last Name, Address) and each subsequent row holds one record. Remove any blank rows.
- In Word, go to the Mailings tab and click Start Mail Merge. Select the document type you want to create (letters, envelopes, labels, etc.).
- Click Select Recipients > Use an Existing List, then browse to your Excel file and select the worksheet that contains your data.
- Place your cursor where you want data to appear in the Word template, then click Insert Merge Field and choose the appropriate column header. Repeat for each field you need.
- Click Preview Results on the Mailings tab to see how the merged document will look with actual data from your spreadsheet.
- When everything looks correct, click Finish & Merge to generate your final documents. You can print them directly, create individual files or send them as email messages.
Common use cases for mail merge include:
- Form letters addressed to a list of clients or employees
- Mailing labels printed from a contact spreadsheet
- Employee certificates or awards personalized with names and dates
- Invoices or purchase orders populated with line-item data
Tips for Inserting Excel Data into Word
No matter which method you choose, a few best practices will help you get cleaner results and avoid common headaches when moving data between the two applications.
- Format your Excel data before inserting it into Word. Clean up column headers, remove blank rows, verify any hyperlinks in your spreadsheet and apply consistent number formatting so you spend less time fixing the table after the transfer.
- Keep source files in a shared or stable location when using links. If you move or rename the Excel file, every linked Word document that points to it will break.
- Use "Paste as Picture" when you need a clean visual and do not need to edit the data. This avoids formatting conflicts entirely and gives you an exact replica of what you see in Excel.
- Resize embedded objects by dragging the corner handles to maintain the correct aspect ratio. Dragging from a side handle will stretch the object and distort your data.
- Name your Excel ranges before starting a mail merge. Named ranges make merge fields easier to identify and reduce errors when connecting Word to your data source.
- Test linked documents on another computer before distributing them. This confirms that file paths resolve correctly and that recipients can see updated data.
Pryor Learning offers hands-on Excel and Word training that covers these techniques and more. Explore our course catalog to build the skills you need to work faster and more confidently across Microsoft Office.