Excel
Apr 7, 2026
Four Ways to Add Hyperlinks in Excel

Key Takeaways
- Use Ctrl+K or the Insert tab to quickly add hyperlinks in any Excel cell
- Excel supports four hyperlink types: web pages, files, email addresses and locations within the workbook
- The HYPERLINK function lets you create dynamic links based on cell data
- Right-click any hyperlink to edit, open or remove it
Types of Hyperlinks You Can Create in Excel
Before diving into the methods, it helps to understand what kinds of links Excel supports. When you insert hyperlink Excel options, you'll find four distinct types:
- Web Page Links: Navigate to any URL on the internet. Use these to connect spreadsheet data to online resources, documentation or company websites.
- Existing File Links: Open documents, PDFs or other workbooks stored on your computer or network drive. Perfect for linking to supporting documentation.
- Place in This Document: Jump to a specific cell, range or sheet within the current workbook. Essential for navigating large or complex files.
- Email Address Links: Open a new email with a pre-filled recipient address. Useful for contact lists or team directories.
When to Use Each Method
Each of the four methods below works best in different situations. Here's a quick guide to help you choose:
| Method | Best For | Complexity | Notes |
|---|---|---|---|
| Copy/Paste URL | Quick web links | Simple | Excel auto-formats valid URLs |
| Drag and Drop | Internal workbook navigation | Simple | Requires saved workbook |
| Insert Hyperlink Dialog | All link types with customization | Moderate | Most flexible option |
| HYPERLINK Function | Dynamic links based on data | Advanced | Ideal for bulk link creation |
We all use hyperlinks every day. That clickable, sometimes underlined, sometimes blue text has come to be as familiar as text itself. There's more to the program than just Excel formulas, and while hyperlinks might not be as common in Excel, there are many uses for hyperlinks within a workbook as well. You might link to product documentation in an inventory sheet or include a personal webpage column when gathering information about job applicants.
You can also create links to specific sheets and ranges within a workbook. This can help viewers find important information in very large, or very complicated files. Here are four ways to add them to your sheets and when you might do so.
1. Copy/Paste URLs Into a Cell to Automatically Create Hyperlinks
When text entered into a cell is formatted as a valid website address, Excel should recognize it and automatically apply a hyperlink to that text. Simply type or copy/paste the address into a cell and let Excel apply the hyperlink.
2. Drag and Drop to Link Cells Within a Workbook
The easiest way to link between cells or ranges within a workbook is to simply drag and drop!
- Select the destination cell or cell range. Note, your workbook must have been saved and given a name. This technique won’t work in a brand-new file that hasn’t been saved yet.
- Hover over the selection’s border and click and hold the RIGHT mouse button.
- Drag to the cell where you want a link and release. To cross sheets, press the Alt key when you hover over the sheet tab, then continue dragging once the sheet opens.
- Release the mouse button when the correct cell is selected and select Create Hyperlink Here. This will apply a hyperlink to the existing cell text. Select Link Here if you want to use the destination text for the link.
Excel automatically creates a hyperlink to the selected cell. Your cursor will jump to this cell when clicked.
3. Use the Insert Hyperlink Dialog
The Insert Hyperlink dialog gives you the most options for formatting and setting up hyperlinks. Use this when you want to customize a link or quickly apply a link to another sheet within your document or another workbook entirely.
- How to hyperlink in Excel - Select the cell where you want the hyperlink, then click the Link button on the Insert tab to open the Insert Hyperlink. You can also Right-click on the cell and select Hyperlink from the flyout menu.
- Choose the kind of link you are creating in the Link to: pane
- Existing File or Web Page will take you to an external file or website.
- Place in This Document will help you link to a cell or range within the same workbook.

Hint! This is a great place to use Named cells and Named ranges to make it easier to link to sections of your workbook more easily.
- Create New Document will walk you through creating a new file from scratch.
Email Address will help you format the link correctly to open an email pane.
3. Enter the text for your link in the Text to display: field if needed.
4. Complete the information needed in the center pane and click
In our example, we want to link the region information to the web listing of all the agents in that region. So, we will choose the Existing File or Web Page option and copy/paste in the web address in the Address field.

4. Use the HYPERLINK function
Lastly, you can build hyperlinks using the HYPERLINK function. This is useful when you have links that are based on other fields of data such as an email address that is ALWAYS a person’s first and last name plus “@company.com” for example.
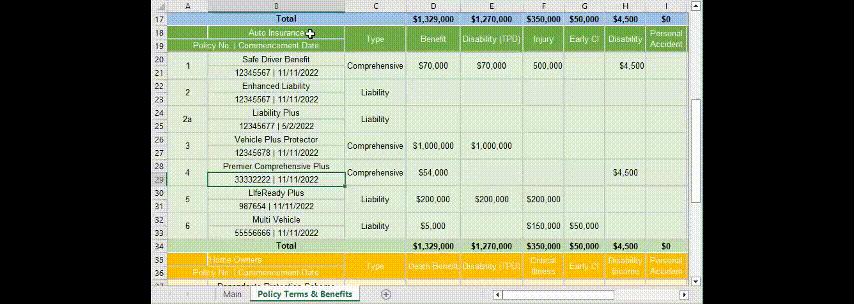
In this example, we want to link to the brochure for the specific policy that was purchased and place that link in the Brochure Link column.
We also know that brochures are named consistently and located in the same folder on the network drive. This means that you can always create a working URL by combining the folder path and the filename which is always the State Code plus “.pdf”.
Here is the Syntax for the HYPERLINK function:
HYPERLINK(link_location, [friendly_name])
The Link_location argument is where you specify the path and file name to the document you are linking. The destination can be a file path or a URL on the internet if using the desktop version of Excel. (Only web URLs will work on the web version of Excel.)
The [friendly_name] argument is optional and lets you customize the text of the link within the cell. If left empty, the URL address in the link_location argument is displayed.
A very simple example:
=HYPERLINK(“http://www.pryor.com/blog/category/excel”, “Open Excel Blog”)
Notice that the URL and friendly_name link text is in quotations.
But to create a link that simple, we’d just use the insert dialog from above. Instead, we want to create dynamic links and dynamic link text based on our data. The function allows us to build the link_location based on:
· The folder file path: https://drive.company.com/brochures/2022/ which will be enclosed in “quotes” to indicate static text.
· The file name using Column H indicated by cell name.
· And the file type: .pdf also enclosed in “quotes” to indicate that this exact text is to be appended after the text in the cell name.
Our resulting formula would then be:
=HYPERLINK("https://drive.company.com/brochures/2022/"&H2&".pdf")
The ampersand (&) connects the static and dynamic elements to produce a location result as seen in cell J2:
http://drive.company.com/brochures/2022/AR-Auto.pdf
To make our sheet even more helpful, we can use the friendly_name argument in the same way to produce an informative link. This is shown in cell J3 with the formula:
=HYPERLINK("http://drive.company.com/brochures/2022/"&H3&".pdf",H3&" Brochure")
With the easy-to-read result seen in J3: AR-Auto Brochure
While it might be a trick to set up a link using the HYPERLINK function, when you have a whole sheet of links that are consistent in this way, you can do it once, then simply drag the formula down the column as we’ve done here!

Edit Hyperlinks in Excel
If you need to change or remove a hyperlink from an Excel cell, right-click on the cell and choose an option from the fly-out menu: Edit, Open (which will take you to the link) or Remove.
Troubleshooting Common Hyperlink Issues
Even with the right technique, hyperlinks sometimes don't work as expected. Here are quick fixes for the most common problems:
- Link doesn't activate when clicked: Check that the URL is complete and correctly formatted. Web addresses need "http://" or "https://" at the beginning.
- Drag-and-drop link fails: Your workbook must be saved before using this method. Save the file first, then try again.
- Link breaks after moving the file: File path links are location-dependent. If you move the linked file, you'll need to edit hyperlink Excel settings to update the path.
- URL doesn't auto-format as a link: This feature may be disabled. Go to File > Options > Proofing > AutoCorrect Options > AutoFormat As You Type and check "Internet and network paths with hyperlinks."
- Link opens in wrong application: Right-click the cell and select Edit Hyperlink to verify the destination is correct and the link type matches your intent.
Put Your Excel Skills to Work
Hyperlinks can be more than just data you are storing. They can help you navigate complicated workbooks and are key to creating useful dashboards. Whether you're using the quick copy/paste method for web links, the Insert Hyperlink dialog for customized navigation or the HYPERLINK function for dynamic link building, these techniques make your spreadsheets more interactive and user-friendly.
Practice the techniques shown here and let us know the ways you plan to use them!


